Dataset Annotations
Annotations are descriptions of imagery contents formatted for machine learning algorithms. Rendered.ai provides conversion services to multiple standard formats.
Supported Annotation Formats
The platform supports the following annotation formats:
| Format | Description |
|---|---|
| COCO | Common Objects in Context (COCO) dataset was created for object detection, segmentation and captioning |
| GEOCOCO | Geospatial data annotation format compatible with COCO tools |
| PASCAL | PASCAL VOC challenge provides standardized datasets for comparing model performance |
| YOLO | You Only Look Once (YOLO) object detection system |
| KITTI | Format for image classification |
| SageMaker OD | Object detection using MXNet |
| SageMaker SS | For use with semantic Segmentation Algorithm |
Mapping Annotations
Users can map objects to specific classes to consolidate similar items. For example, you might group various toy types and cube variants into two categories using a YAML annotation map.
The annotation map is a YAML file with two sections:
- classes: Integer keys paired with class lists (supporting hierarchies)
- properties: Python eval statements determining class assignments based on object metadata
Here is an example annotation map:
classes:
    0: [none, Cubes]
    99: [none, Toys]
properties:
    obj['type'] == 'YoYo': 99
    obj['type'] == 'BubbleBottle': 99
    obj['type'] == 'Skateboard': 99
    obj['type'] == 'Cube': 0
    obj['type'] == 'Mix Cube': 0
    obj['type'] == 'PlayDough': 99
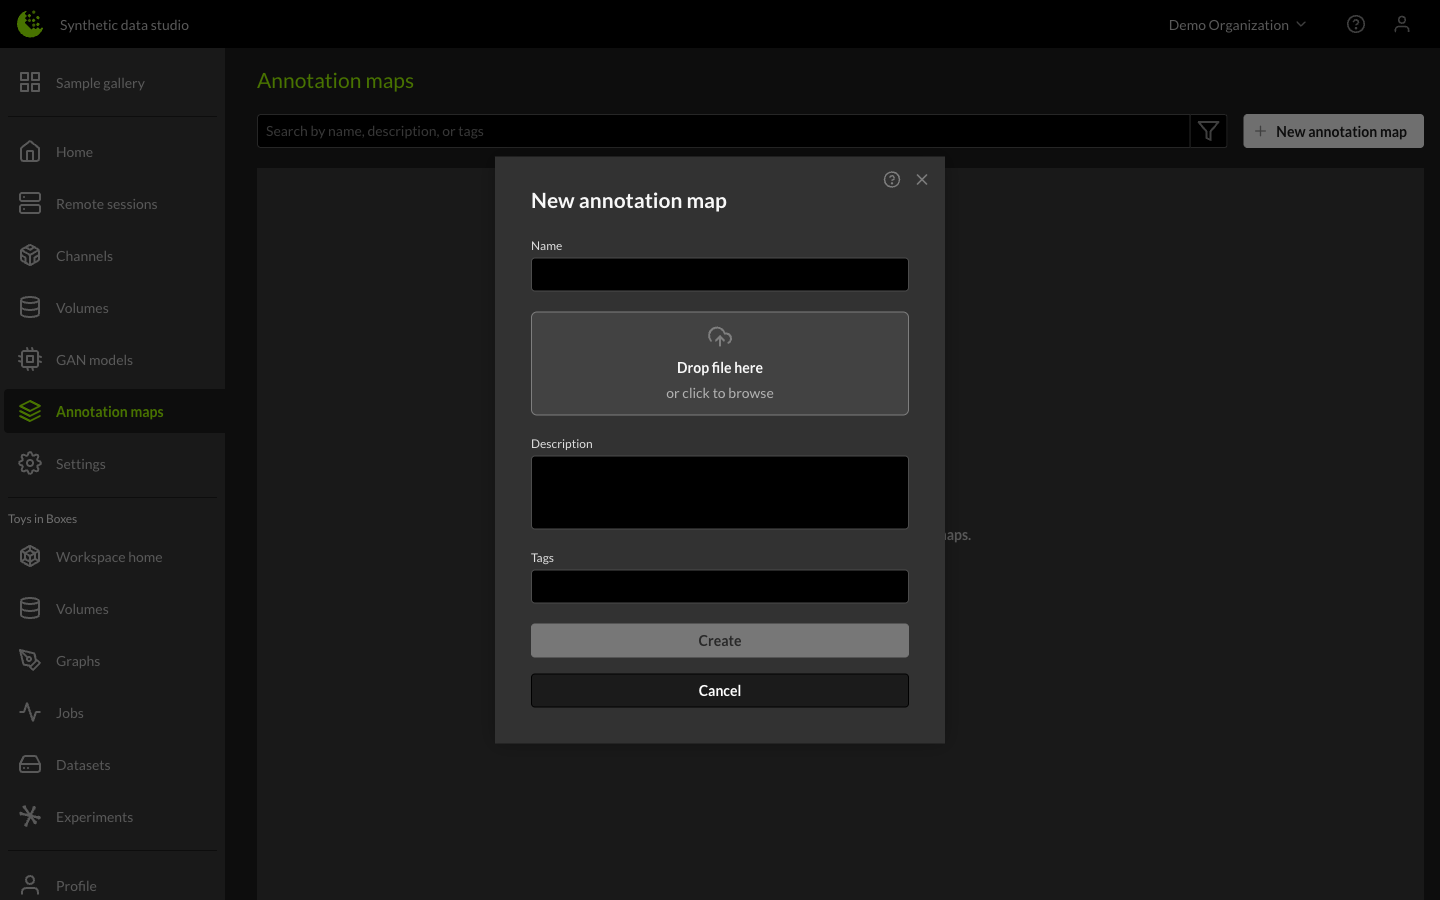
Creating Annotation Maps
To create an annotation map:
- Navigate to your organization's Annotation Map tab.
- Click the + New Annotation Map button.
- In the dialog, enter a name for the map and upload the YAML file. Optionally add a description.
- Click Create.
Creating Annotations
To create annotations for a dataset:
- Navigate to your workspace Resources and add the Annotation Map to the workspace.
- Select the dataset in the Dataset Library.
- Click the + icon next to Annotations in the right-side panel.
- Select the annotation format and annotation map from the lists.
- Click the Create button to start the annotation job.
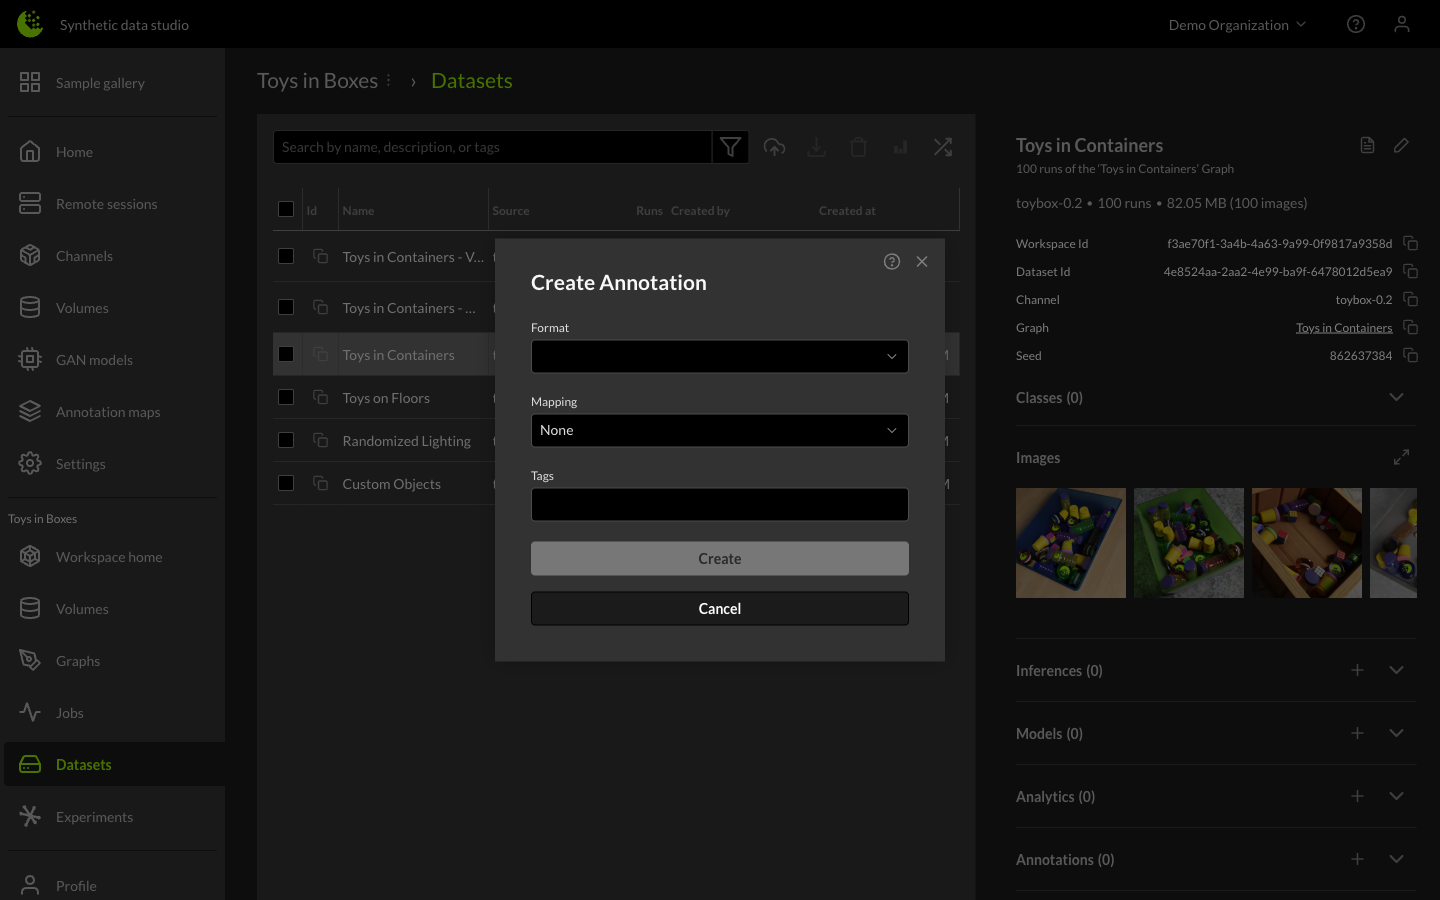
Once the job is complete, you can download the annotation files via the download icon.
Job Status
Three status states are available:
- No symbol: The service job is complete and ready to use.
- Sand dial symbol: The job is running. It will remain this way until the job has either completed or failed.
- Error symbol: The job has an issue. You can click on the symbol to fetch a service log.